Table of contents
Bringing PHP and IoT together
The content here is under the Attribution 4.0 International (CC BY 4.0) license
Recently I’ve been around IoT with PHP and I made some small projects such as LED blink, sensor management and so on. Therefore I chose PHP to be my main language to dig into IoT’s world, for my surprise it was a tough decision.
Unfortunately, we have few libraries written in PHP to deal with I/O and these kinds of components. At first, it is normal to have a lack of content because PHP was built to be used on the web. However, we can make it better. Here, I am going to use PHP to connect with Arduino and turn on an LED.
So let’s have a look at our sketch (the code that goes into the Arduino board).
int led = 13;
String input = "";

void setup() {
  pinMode(led, OUTPUT);

  Serial.begin(9600);
}

void loop() {
  if (Serial.available() > 0) {

    input = Serial.readString();

    if (input == "ON") {
      digitalWrite(led, HIGH);
    } else {
      digitalWrite(led, LOW);
    }

    Serial.println(input);
  }
}
I uploaded the same code on Autodesk 123D Circuits and you can try it yourself, just click on “Start Simulation”.
Simulation
Probably if you try to simulate, you will see nothing happening in the simulation, and it looks a bit strange, but it is exactly what it should do: nothing. If we take a look inside the sketch, we’ll see a lot of interaction with the Serial port, and there is a reason why the Arduino does nothing. The Serial port is the way out of the Arduino and the path to communicate with other devices or programming languages. We can see a few tutorials at the Arduino playground to get a better idea. Go ahead and after you click on “Start Simulation” click on “Code Editor”, the console will show up with the core running on Arduino. In the right side there is a tab named “Serial Monitor”, click on that as well. On the right panel that will show up you can type any command to interact with.
If you have any idea what our sketch does, you see that we must type “ON” to turn the LED on, and “OFF” to turn it off.
The PHP world will interact with Serial port on Arduino and send exactly the same command (ON, OFF) to turn the LED ON and OFF.
Finally, the PHP
Ok, now we understand how to run code in our simulator, and we need to interact with PHP. To achieve that, we are going to use PHP streams. The functions used here are known to C developers and might be familiar to PHP developers as well. Let’s see some code and then an explanation.
<?php
$resource = fopen('/dev/ttyUSB0', '+r');

fwrite($resource, 'ON');
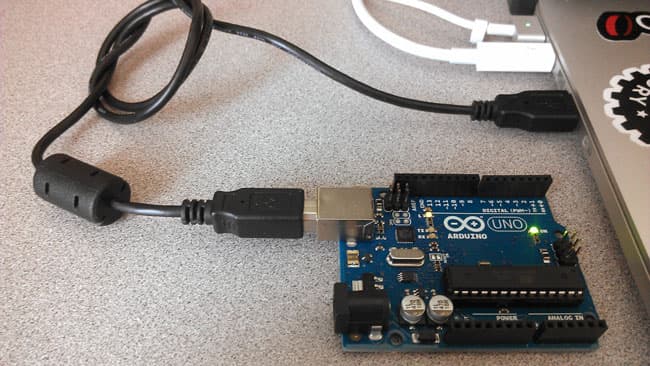
The first thing we do is use the fopen function on an old known entry in Linux, the ttyUSB0 under the /dev directory. It means that a USB device is connected to one port on your computer or laptop. If you have more than one USB device connected, the number 0 at the end will increase to USB1, USB2, and so on. If no USB device is connected, PHP will throw an error like the following (so make sure your USB is connected to both the Arduino and your computer):
<?php
PHP Warning:  fopen(/dev/ttyUSB0): failed to open stream:
Inappropriate ioctl for device in /home/marabesi/fopen.php on line 3

Then just be happy. If your Arduino is connected and you run the script in PHP, the LED should turn on. To turn it off, just change ON in the PHP script to OFF.