Building Real-Time Applications with Raspberry Pi and PHP Sockets: Unleashing the Power of WebSockets and HTML5
The content here is under the Attribution 4.0 International (CC BY 4.0) license
Join Our Community
Connect with developers, architects, and tech leads who share your passion for quality software development. Discuss TDD, architecture, software engineering, and more.
→ Join SlackRecently I did a post about HTML5 WebSockets and it had a purpose. I was preparing the material for my talk at Samsung Ocean and my goal was to create an RC car with a Hybrid application to control it and not use Java as a server-side language. The final result you can check on my GitHub and play around with the code. The following steps are to get the socket working in your Raspberry, here I’m going to use the model B+.
First of all
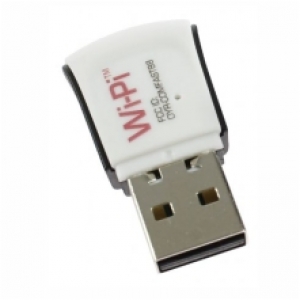
We need to to access our Pi through the SSH, for this example, I’m going to use the WiPi (wireless adapter for Raspberry Pi). But you can use the RJ-45 to access it or use a little monitor with a keyboard on the Pi, Feel free to choose your option just make sure you will have this access. In this tutorial, I won’t cover how to set up wireless on your pi, refer to wireless documentation to get it done.
With that, we are ready to start updating the Pi and writing some code to get the server and the client working. For the following sections, some of the snippets are collapsed to make reading easier.
Getting started
For this example we are going to use only the php without any web server, it is interesting isn’t it? Let’s update our Pi and install the PHP
sudo rpi-update
After a few minutes, the pi will be up to date and then we can finally install the PHP
sudo apt-get install php5
Setting up the socket
Choose a directory and create a socket.php file with the content collapsed, I'm going to use my directory called /home/marabesi
<?php

$host = 'localhost';
$port = '9002';
$null = NULL;

$socket = socket_create(AF_INET, SOCK_STREAM, SOL_TCP);

socket_set_option($socket, SOL_SOCKET, SO_REUSEADDR, 1);

socket_bind($socket, 0, $port);

socket_listen($socket);

$clients = array($socket);

echo 'Socket listening on host: ' . $host . ' port: ' . $port . PHP_EOL;

while (true)
{
  $changed = $clients;

  socket_select($changed, $null, $null, 0, 10);

  if (in_array($socket, $changed))
    {
    $socket_new = socket_accept($socket);
    $clients[] = $socket_new;

    $header = socket_read($socket_new, 1024);
    perform_handshaking($header, $socket_new, $host, $port);

    socket_getpeername($socket_new, $ip);
    $response = mask(json_encode(array('server' => $ip . ' connected')));
    send_message($response);

    $found_socket = array_search($socket, $changed);
    unset($changed[$found_socket]);
  }

  foreach ($changed as $changed_socket)
    {
    while(socket_recv($changed_socket, $buf, 1024, 0) >= 1)
    {
      $received_text = unmask($buf);
      $jsonObject = json_decode($received_text);

                        $createResponse = json_encode(array('server' => $ip . ' : ' . utf8_encode($received_text)));

                        echo $received_text . PHP_EOL;

      $response_text = mask($createResponse);
      send_message($response_text);

      break 2;
    }

    $buf = @socket_read($changed_socket, 1024, PHP_NORMAL_READ);

    if ($buf === false)
        {
      $found_socket = array_search($changed_socket, $clients);
      socket_getpeername($changed_socket, $ip);
      unset($clients[$found_socket]);

      $response = mask(json_encode(array('server' => $ip . ' disconnected')));
      send_message($response);
    }
  }
}

socket_close($sock);

function send_message($msg)
{
  global $clients;
  foreach($clients as $changed_socket)
  {
    @socket_write($changed_socket,$msg,strlen($msg));
  }
  return true;
}

function unmask($text)
{
  $length = ord($text[1]) & 127;
  if($length == 126) {
    $masks = substr($text, 4, 4);
    $data = substr($text, 8);
  }
  elseif($length == 127) {
    $masks = substr($text, 10, 4);
    $data = substr($text, 14);
  }
  else {
    $masks = substr($text, 2, 4);
    $data = substr($text, 6);
  }
  $text = "";
  for ($i = 0; $i < strlen($data); ++$i) {
    $text .= $data[$i] ^ $masks[$i%4];
  }
  return $text;
}

function mask($text)
{
  $b1 = 0x80 | (0x1 & 0x0f);
  $length = strlen($text);

  if($length <= 125)
    $header = pack('CC', $b1, $length);
  elseif($length > 125 && $length < 65536)
    $header = pack('CCn', $b1, 126, $length);
  elseif($length >= 65536)
    $header = pack('CCNN', $b1, 127, $length);
  return $header.$text;
}

function perform_handshaking($receved_header,$client_conn, $host, $port)
{
  $headers = array();
  $lines = preg_split("/\r\n/", $receved_header);
  foreach($lines as $line)
  {
    $line = chop($line);
    if(preg_match('/\A(\S+): (.*)\z/', $line, $matches))
    {
      $headers[$matches[1]] = $matches[2];
    }
  }

  $secKey = $headers['Sec-WebSocket-Key'];
  $secAccept = base64_encode(pack('H*', sha1($secKey . '258EAFA5-E914-47DA-95CA-C5AB0DC85B11')));
  $upgrade  = "HTTP/1.1 101 Web Socket Protocol Handshake\r\n" .
  "Upgrade: websocket\r\n" .
  "Connection: Upgrade\r\n" .
  "WebSocket-Origin: $host\r\n" .
  "WebSocket-Location: ws://$host:$port/demo/shout.php\r\n".
  "Sec-WebSocket-Accept:$secAccept\r\n\r\n";
  socket_write($client_conn,$upgrade,strlen($upgrade));
}
Now we have to create a simple HTML file to interact with our socket and see it working, from now on we have two paths to take the first is to create an HTML file on the Pi and then access it, and the second is to create a simple HTML in our PC and just make the connection to our socket into the Pi. Just make sure you execute the socket.php file in the Pi to be able to listen on port 9000.
php /home/marabesi/socket.php
If everything goes well you’ll see the following message
Socket listening on host: localhost port: 9000
You must keep the socket.php executing otherwise it won’t let you connect through the socket. To simplify this post I’m going to go with the second option, but you can install a web server such as nginx in your pi and try it yourself! As an alternative you can use the Ratchet to create your socket in a much easier way and with amazing use of Object Oriented Programming, you should check it out.
Creating the HTML page to interact with
Now we can save the following code in a file called index.html (click here to see the full code snippet). With the code snippet at hand, we have to modify two things to get things done.
<!DOCTYPE html>
<html>
    <head>
        <title>WebSocket - Raspberry Pi</title>
        <meta charset="UTF-8">
    </head>
    <body>
        ## Test your websocket connection!
        <h3>Just type and press enter ;)</h3>
        <div id="container"></div>
        <input type="text" placeholder="Write your message to the WebSocket!" id="message" />
        <script>
            (function () {
                var url = 'ws://raspberryIp:raspberryPort';
                var mySocket = new WebSocket(url);
                var container = document.getElementById('container');

                var key = document.onkeypress = function (event) {
                    event = event || window.event;

                    if (event.which == 13) {
                        var message = document.getElementById('message');

                        container.innerHTML += '<div><span>Me :</span><span>' + message.value + '</span></div>';
                        console.log('me: ' + message.value);
                        mySocket.send(message.value);
                        message.value = '';
                    }

                    return event.which;
                };

                mySocket.onopen = function () {
                    console.log('opened !');
                    container.innerHTML += '<h2>Connection established : ' + url + '</h2>';
                };

                mySocket.onmessage = function (e) {
                    console.log('server: ' + e.data);
                    container.innerHTML += '<div><span>Server: </span><span>' + e.data + '</span></div>';
                };

                mySocket.onclose = function () {
                    console.log('closed !');
                    container.innerHTML += '<h2>Connection closed</h2>';
                };
            }());
        </script>
    </body>
</html>
- Where you see raspberryIp you should change to your Raspberry IP
- Where you see raspberryPort you should also change to the port where the socket is running and in this example, the port is 9002
The HTML code was originally made on codepen.io and you can see the working example above, with the bootstrap style.
Edit: 17/03/2016 - Setting up Apache virtual host
If you don’t have Apache installed just type
sudo apt-get install apache2
You can install it on Raspberry Pi or anywhere you want to. After that, we need to create a virtual host.
touch /etc/apache2/sites-available/websocket.conf
and with the file created just copy and paste the following code
<VirtualHost *:80>
  ServerName websocket

  DocumentRoot /var/www/websocket

  ErrorLog ${APACHE_LOG_DIR}/error.log
  CustomLog ${APACHE_LOG_DIR}/access.log combined
</VirtualHost>
As you can see our root directory is /var/www/websocket and is the place where you should save the HTML we created to manipulate our socket connection.
Changelog
- May 01, 2024 - Grammar fixes